How Do I Remove and Install My Tractor’s Front Wheels?
- Team Tractor and Equipment
- Apr 11, 2021
- 2 min read
We want to help you remove and install your tractor’s front wheels.
If you do not feel that you understand these steps, or can perform them safely, consult your tractor dealer or local mechanic. Also always consult your tractor owner’s manual for model-specific information.
Time to get started.
Reason:
To remove and install your tractor’s front wheels.
1. Park the tractor safely and securely.
2. Shut off the engine.
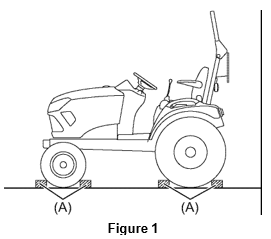
Place chocks (A, Fig. 1) on each driving direction of the front and rear wheels.
A - Chock (8 pieces)
NOTE:
Make sure that the parking brake is securely engaged.
Make sure to lower any implements to the ground.

3. Loosen the front wheel bolts.
Half turn the wheel bolts (A, Fig. 2) from the front wheel (B, Fig. 2).
Do the preceding procedure to all the front wheel bolts.
Do the preceding procedure to the other front wheel.
A - Wheel bolt (4 pieces)
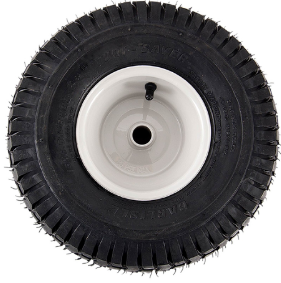
B - Front wheel
Note:
Do not remove the two front wheels at the same time unless it is necessary.

4. Remove the front wheels.
Lift the front wheels (A, Fig. 3).
- Place suitable lifting equipment (B, Fig. 3) underneath the front axle (C, Fig.3).
- Raise the lifting equipment until both front wheels are above the ground.
- Place suitable jack stands (D, Fig. 3) underneath the left and right portion of the front axle.
- Slowly lower the lifting equipment to settle the front axle onto the jack stands.
Remove the front wheels.
- Remove the wheel bolts (E, Fig. 4).
- Put the wheel bolts in a safe place.
- Remove the front wheel.
- Roll the front wheel safely away to a safe place.
Do the preceding procedure to the other front wheel.

A - Front wheel (2 pieces)
B - Lifting equipment
C - Front axle
D - Jack stand (2 pieces)
E - Wheel bolt (4 pieces)
Warning:
The front wheel is heavy.
Have another person assist you during the removal of the front wheel.
Note:
Raise the lifting equipment just high enough to slide the jack stands underneath the front axle.
Make sure that the left and right front wheels are slightly above the ground when lowered to the jack stands.
Do not use the lifting equipment to support the tractor.
5. Install the Front Wheels
IMPORTANT: Avoid damage!
Before assembly, ensure that all the component parts are clean and in good condition.
Install the front wheels.
- The installation of the front wheels on the tractor is the reverse of the removal procedure.
NOTE:
Tighten the wheel bolts in a crisscross manner.
Tighten the wheel bolts for R3 and R4 (E, Fig. 4) to 126.9 to 140.1 fl lbs. (172 to 190 N•m).
If you need any further help or have any questions about wheels, tractors, implements, or anything else, please contact your dealer, local mechanic, or call us at 602-734-9944. Please ask about our current new and used tractor supply.
Team Tractor Ranch - #1 Tractor Dealer in Arizona. We sell and service most major brands of tractors including Yanmar, Kubota, John Deere, TYM, Mahindra, Kioti, Case, New Holland, Massey Ferguson, Ford, Deutz, Case IH, Farmall, International Harvester, Branson Tractors, LS, Shibura, Claas Tractor, McCormick Tractors, Valtra, Solis, YTO, Montana, and Nortrac.


Comments